
What if you could build your own AI assistant that runs on your machine, connects to Telegram, and helps with crypto research, content creation, and community support?
That’s exactly what I tested with OpenClaw.
Instead of using AI only through a normal chat app, I wanted to build something more useful: a real assistant that could live in its own environment, stay organized, and eventually grow into a serious workflow tool for Binance Square content, crypto education, and automation.
In this guide, I’ll show you:
• what OpenClaw is
• why I chose a VMware Ubuntu setup
• the difference between local machine vs VM vs VPS
• and the exact steps I used to get a live Telegram AI bot working
If you want to go from AI user to AI builder, this is a great place to start.
What Is OpenClaw?
OpenClaw is an AI assistant framework that helps you build your own assistant and connect it to real tools, workflows, and chat channels.
Instead of only chatting with AI, OpenClaw lets you create something more structured, such as:
• a Telegram AI bot
• a Discord assistant
• a crypto research copilot
• a content workflow assistant
• a community support bot
• a future skill-powered Binance assistant
What makes OpenClaw interesting is that it’s not just about responses. It’s about building a real assistant environment that you control.
Use cases for OpenClaw
Here are some practical examples:
• Crypto Education Assistant
Explain Bitcoin, wallets, Binance products, risk management, and beginner learning paths.
• Content Assistant
Draft Binance Square posts, Telegram content, educational threads, and campaign ideas.
• Community Copilot
Help answer questions, onboard users, and support crypto communities.
• Research Workflow Tool
Collect ideas, organize notes, and turn research into useful output.
For creators and operators, OpenClaw can become part of a real workflow system.
Local Machine vs VM vs VPS
Before building, I had one key question:
Where should I run my assistant?
1) Local machine
This means installing OpenClaw directly on your laptop or desktop user account.
Best for:
• fast testing
• learning
• simple experiments
Pros:
• easy to start
• no extra cost
• good for quick development
Cons:
• stops when your machine sleeps or shuts down
• less clean if mixed with your daily environment
2) VMware / Virtual Machine
This means creating a dedicated Ubuntu environment inside your computer.
Best for:
• cleaner local development
• safer testing
• learning a server-style workflow
Pros:
• isolated setup
• easier to organize
• closer to a real deployment environment
• great for snapshots and rollback
Cons:
• still depends on your computer being on
• uses more system resources than direct local install
3) VPS
A VPS is best when you want your assistant to be online all the time.
Best for:
• production bots
• 24/7 automation
• long-term public use
Pros:
• always online
• stable
• easier to scale later
Cons:
• monthly cost
• more maintenance and security work
My recommendation
The smartest path for most people is:
Start local or in a VM → learn the setup → move to VPS later
That’s why I used Ubuntu Server inside VMware first. It gave me a clean environment without going straight into full production hosting.
👉My Build Setup👀
Here’s the setup I used:
• Host machine: Windows
• Virtualization: VMware
• Guest OS: Ubuntu Server 24.04
• VM spec: 4 vCPU, 8 GB RAM, 80 GB disk
• Network: bridged
• Goal: OpenClaw + Telegram bot
• Use case: build a real AI assistant environment for future crypto education and content workflows
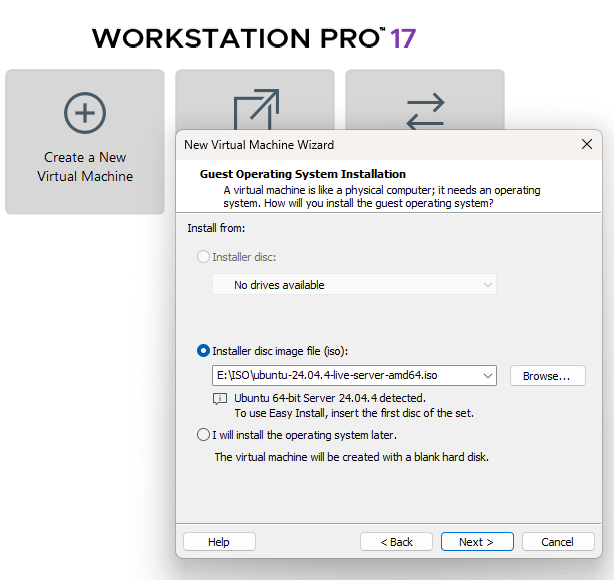
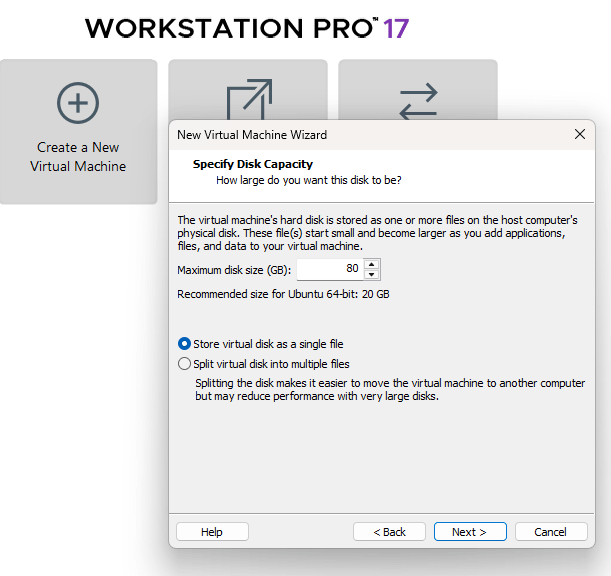
Step 1: Install Ubuntu Server in VMware
I created a new VM with:
• 4 cores
• 8 GB RAM
• 80 GB disk
• Ubuntu Server 24.04
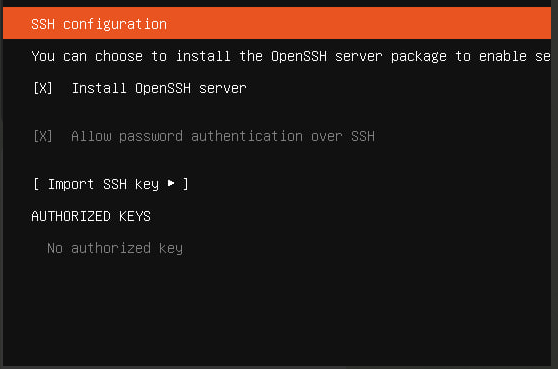
During install, I chose:
• Use entire disk
• LVM enabled
• OpenSSH server enabled
• skipped optional package bundles
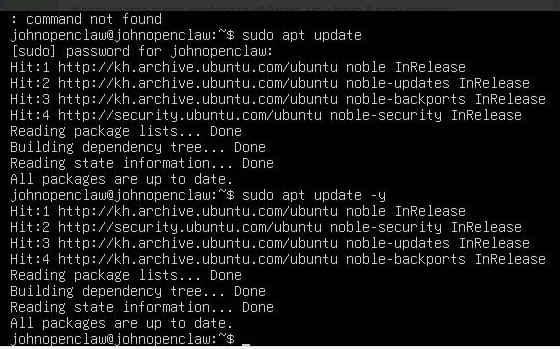
Step 2: Update the system
After logging into Ubuntu, I updated the packages:
sudo apt update
sudo apt upgrade -y
sudo apt install -y curl git build-essential tmux
This prepares the VM for the rest of the setup.

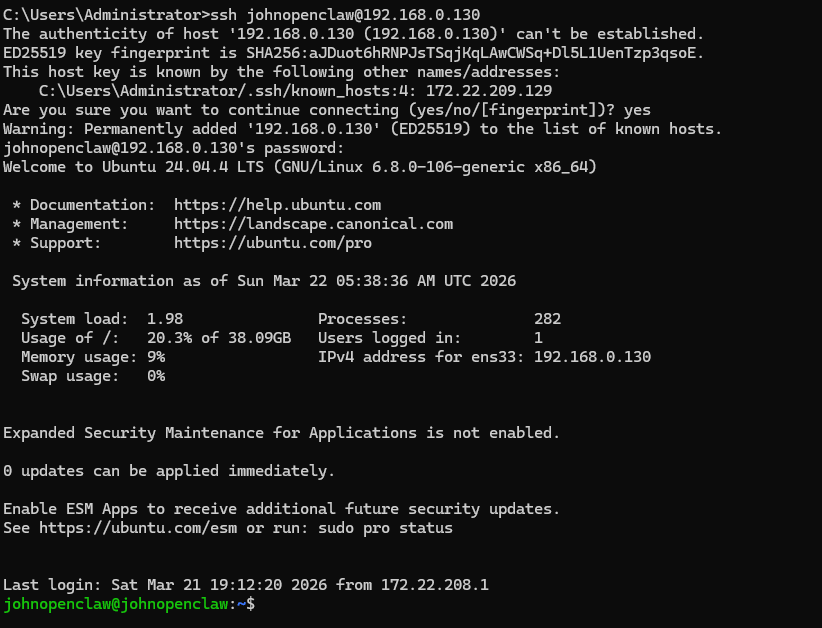
Step 3: Connect with SSH from Windows
Typing directly inside the VMware console was inconvenient, so I switched to SSH from Windows.
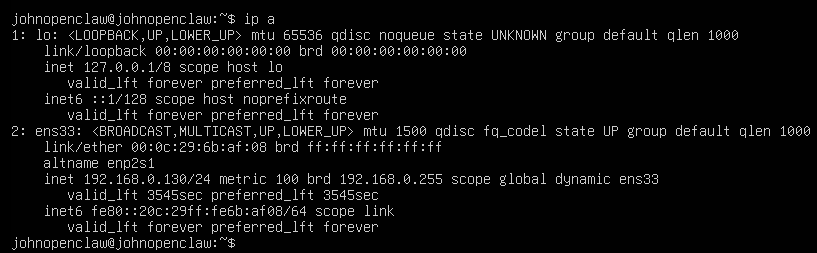
First, I found the VM IP:
ip a
Then from Windows PowerShell:
ssh yourusername@YOUR-VM-IP
That made copy/paste much easier and instantly improved the workflow.
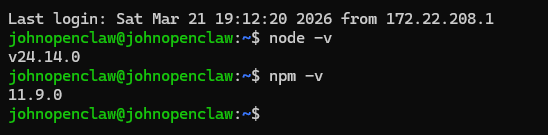
Step 4: Install Node.js with nvm
Then I installed nvm and used it to install Node 24:
curl -o- https://raw.githubusercontent.com/nvm-sh/nvm/v0.40.3/install.sh | bash
source ~/.bashrc
nvm install 24
nvm use 24
nvm alias default 24
node -v
npm -v
Once Node and npm were working, the environment was ready for OpenClaw.
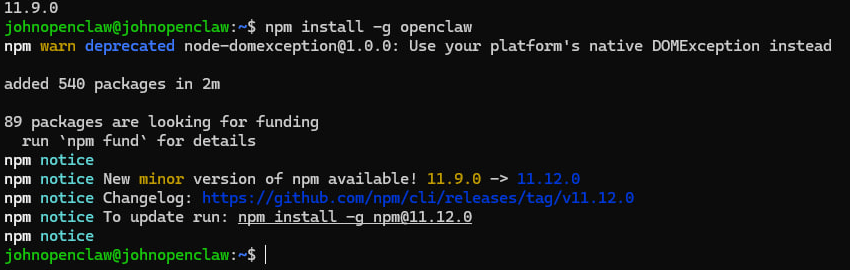
Step 5: Install OpenClaw
Next, I installed OpenClaw globally:
npm install -g openclaw
Then I checked it:
openclaw --help
openclaw status
At this point, OpenClaw was installed, but the gateway was not fully configured yet.
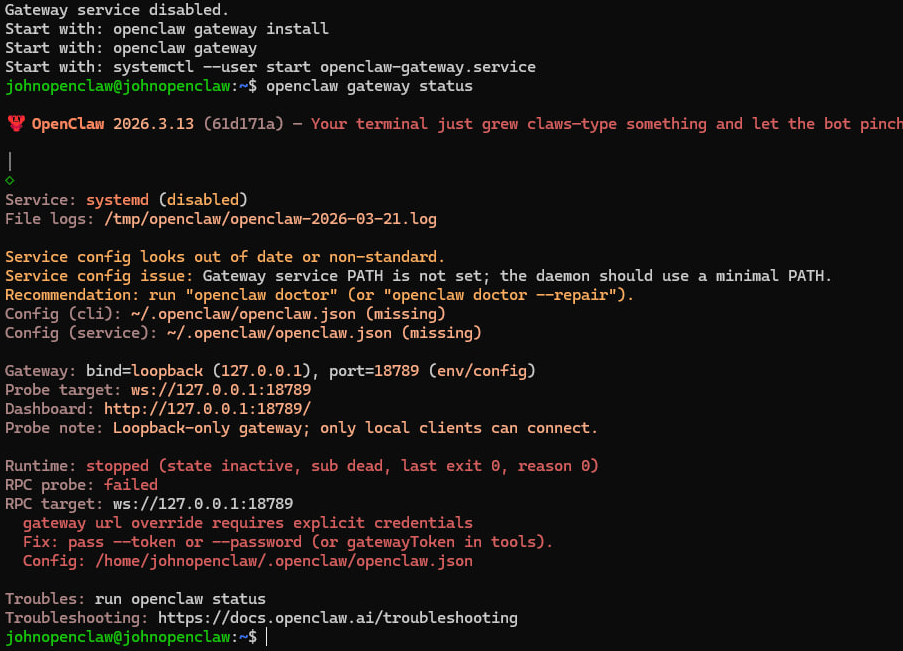
Step 6: Install and start the gateway
To get the service running:
openclaw gateway install
openclaw gateway start
openclaw gateway status
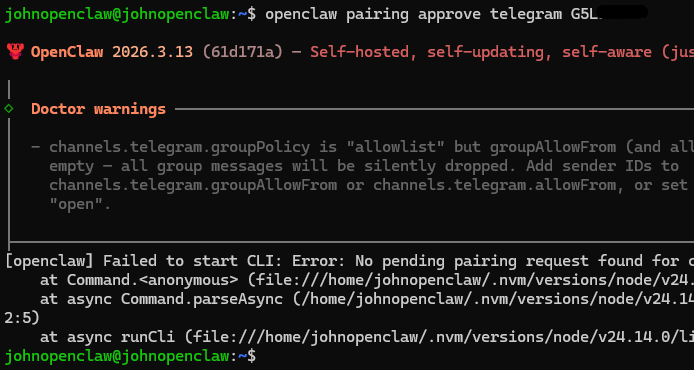
At first, I hit a problem: the gateway service existed, but the actual gateway process was not listening correctly.
So I checked logs and found the cause.

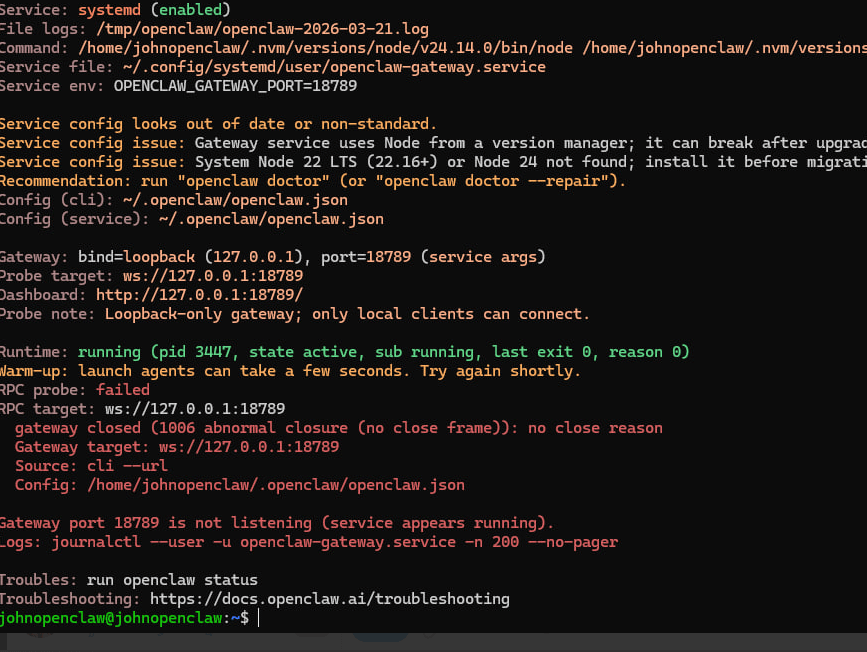
Step 7: Fix the gateway issue
The main issue was:
Gateway start blocked: set gateway.mode=local
So I fixed it with:
openclaw config set gateway.mode local
openclaw gateway restart
openclaw gateway status
After that, the gateway was healthy and listening correctly.
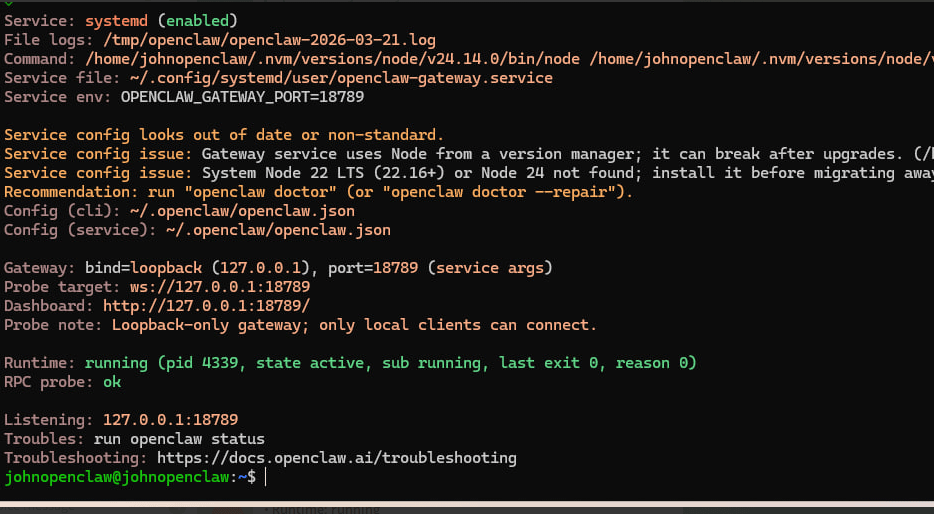
This was the turning point. Once the gateway was live, the assistant environment became real.
Step 8: Configure model and channels
Then I ran:
openclaw configure
Inside setup, I configured:
• the workspace
• the model
• the Telegram channel
For the model, I selected:
• openai-codex/gpt-5.4
For Telegram, I used a bot token created through @BotFather.

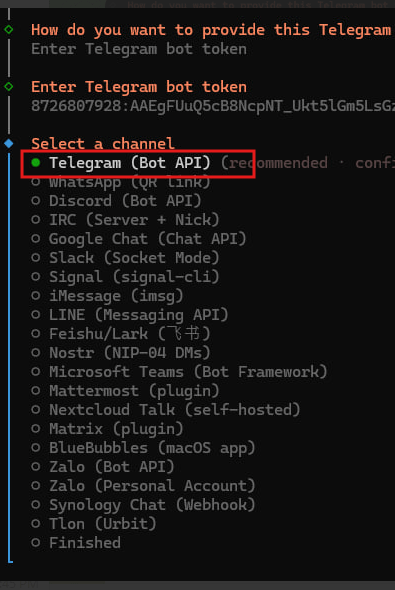
Step 9: Create and connect the Telegram bot
To configure Telegram, I first created a bot with @BotFather and copied the token.
Inside OpenClaw setup, I selected:
• Channels
• Configure/link
• Telegram (Bot API)
• Enter Telegram bot token
After saving that config, the bot was ready for pairing.
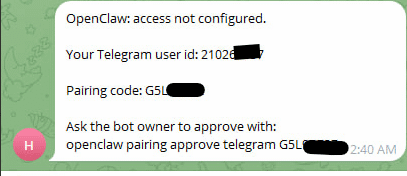
Step 10: Pair the Telegram account
When I sent a message to the bot, OpenClaw gave me a pairing code. Then I approved it in the VM:
openclaw pairing approve telegram YOURCODE
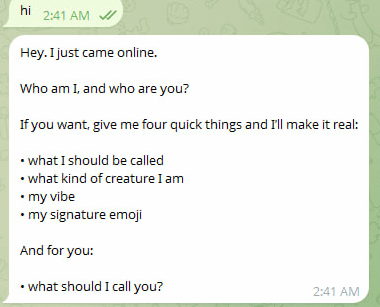
After that, I sent another message in Telegram, and the bot replied successfully.
That was the real “it works” moment.
😍The Result😎
I tested the bot again from another network, and it still worked perfectly.
That proved something important:
This was no longer just a local experiment.
It was now a real working AI assistant setup.
And that opens the door to much bigger use cases:
• crypto education bot
• Binance Square content assistant
• Telegram community helper
• research copilot
• workflow automation tool
Why This Matters for Creators
For creators, the value isn’t just “having AI.”
The real value is building a system that helps you:
• move faster
• stay consistent
• organize ideas
• reply smarter
• turn research into content
• support your audience across platforms
A setup like this can evolve into:
• a Binance learning assistant
• a content drafting copilot
• a community operations assistant
• a crypto workflow system
That’s why I think this matters: once you see your own AI assistant working live, your mindset changes from consumer to builder.
Lessons I Learned
A few practical lessons from this build:
• VMware is a great local lab
• SSH makes setup much easier
• OpenClaw installation is straightforward
• the gateway config matters a lot
• Telegram pairing is simple once the core setup is healthy
• testing from another network is a great confidence check
If I improve this setup later, my next steps would be:
• rotate the bot token
• clean up the Node/gateway environment for long-term stability
• shape the assistant’s identity and prompts
• add future skills and workflow automation
Final Takeaway
If you want to build your own AI assistant, you do not need to start with a perfect cloud setup.
Start with what you have:
• your computer
• a VM
• Ubuntu
• Telegram
• one practical goal
That’s enough to build something real.
And once your assistant replies live for the first time, you’ll understand why this is more than just a tech experiment. It’s the beginning of your own AI infrastructure.
🤯If you’ve been thinking about building your own AI assistant, my advice is simple:
👉Start now. Start small. Build one working version.
Try it in a VM, connect Telegram, and get your first live assistant online. After that, you can improve, expand, and eventually move to a VPS for a full production setup.
If you want, I can also share a follow-up guide on:
• how to improve the assistant’s identity
• how to move from VM to VPS
• how to turn it into a crypto content and research copilot
🙏If you build your own version, share your result in the comments — I’d love to see it.
If this was useful, repost it to help more people start building with AI. And tell me what you want next: VPS deployment, Telegram workflows, prompt design, or Binance skill integration?
#OPENCLAW #AIAssistant #BuildWithYou


