
Recently, many friends have received the Solana second-generation phone Seeker, but they don't know how to activate it. This tutorial is specially made for brothers' reference. Although this phone is produced in China, it has not been officially launched in mainland China, so it actually belongs to the overseas version. When using it for the first time, simply inserting a domestic SIM card or connecting to Wi-Fi will not complete the activation; it must connect to foreign networks in some way to enter the system. Therefore, the core of the entire activation process is how to connect the phone to foreign traffic.
1. Activate in Hong Kong or Macau
I will activate the collected device directly in Hong Kong; just connect to a Hong Kong wifi and log into your Google account to activate. It’s all standard operation, no need to elaborate. If you have difficulties activating it in mainland China, you can also choose to go to Shenzhen Futian Port or Huanggang Port, take a subway to Hong Kong to activate it, which is very convenient.
2. Activating in mainland China through iPhone.
1️⃣ Prepare an external network WiFi environment. You can first connect your iPhone to WiFi.
2️⃣ Open Shadowrocket on the iPhone and enable the proxy by clicking Settings → Proxy → Proxy Sharing in the lower right corner. Pay attention to the IP and port displayed on the following page.

3️⃣ Configuration SeeKer phone
Turn on the phone, enter WiFi settings, and select the same WiFi as your iPhone.
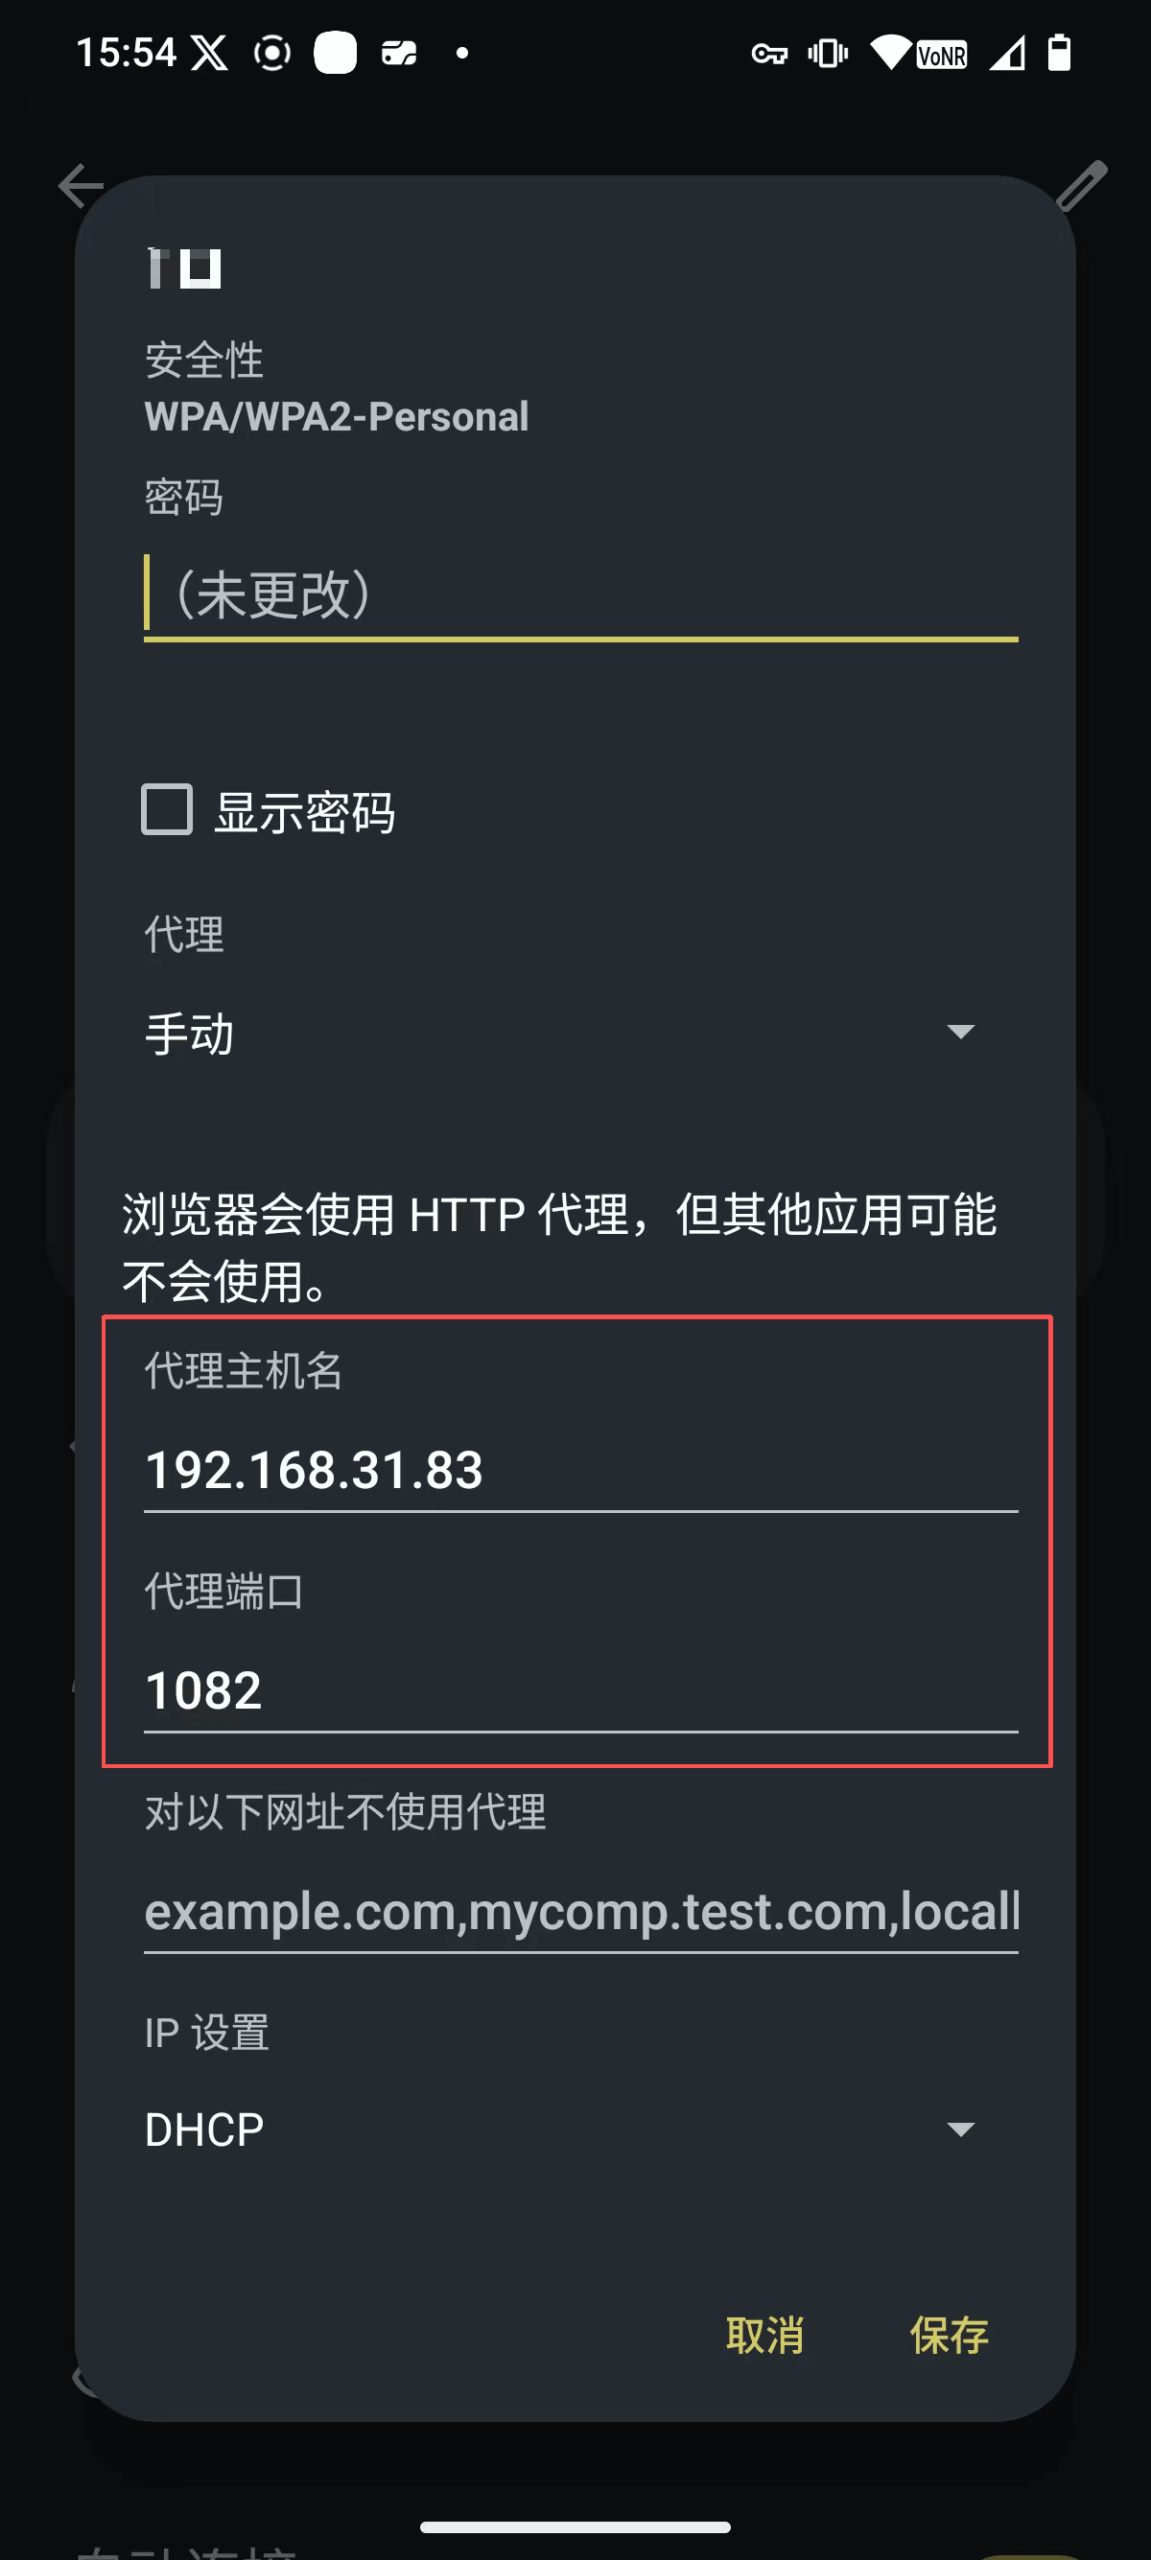
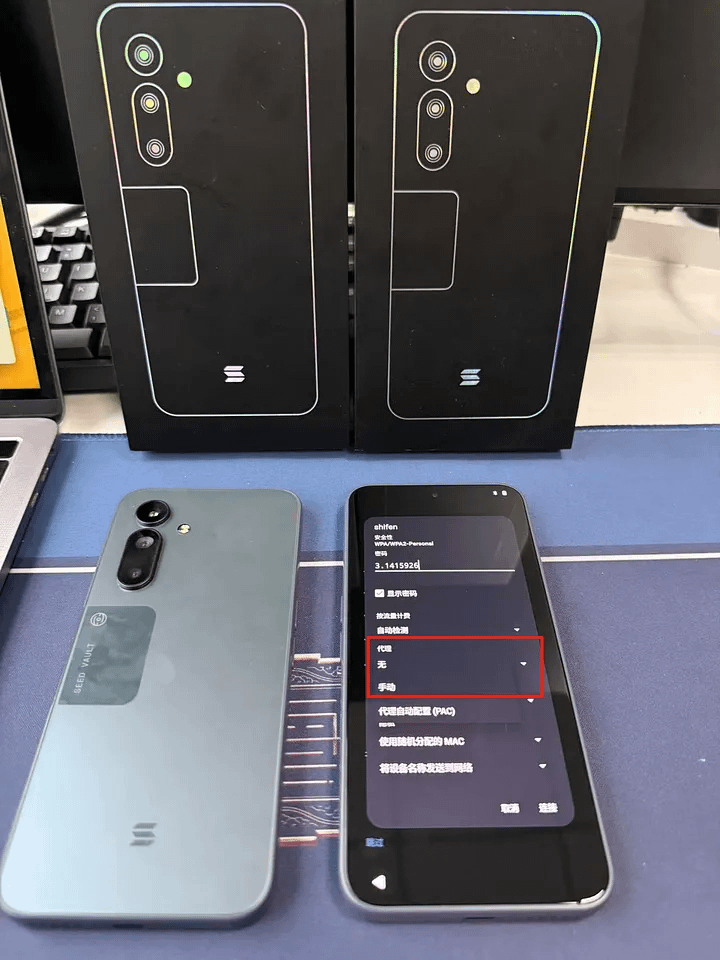
Enter password → Click 'Advanced options' → Click 'Proxy' select: 'Manual', fill in the following information.
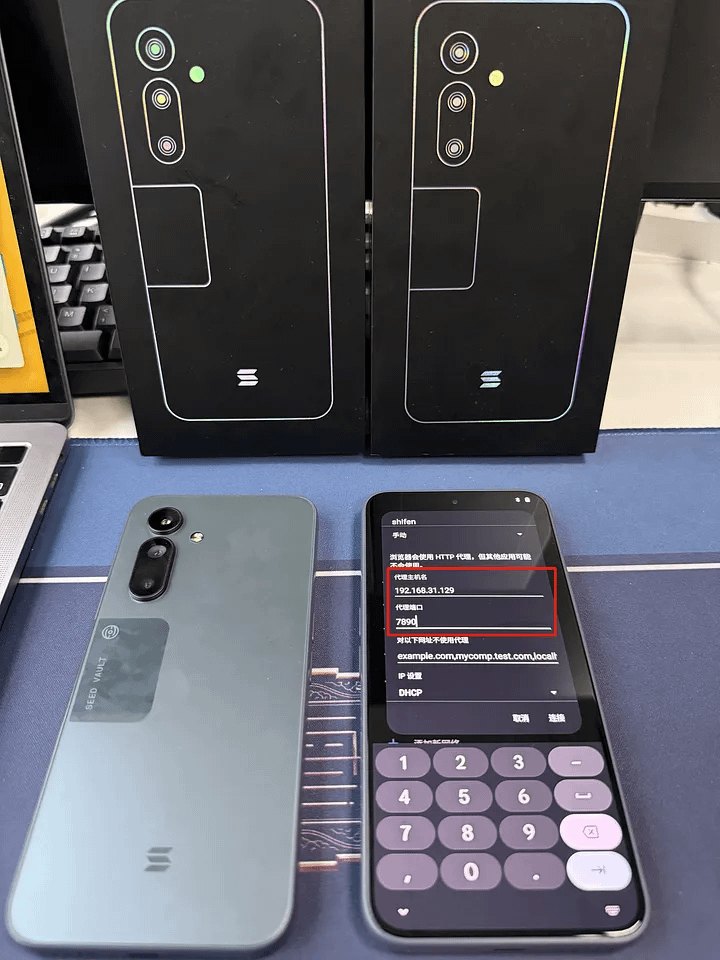
Proxy hostname, fill in the IP shared by the iPhone proxy above.
Proxy port, fill in the port from the iPhone proxy sharing above.
This way, you can connect to the external network through the iPhone's proxy to complete the activation.
3. Activating in mainland China through Android phone.
1️⃣ Here I share an example using Clash. If you want to understand the configuration of other software, you can watch videos by YouTube experts: https://youtu.be/3AtLXkwlxp8?si=8gYPnC5qFpnsrf9V
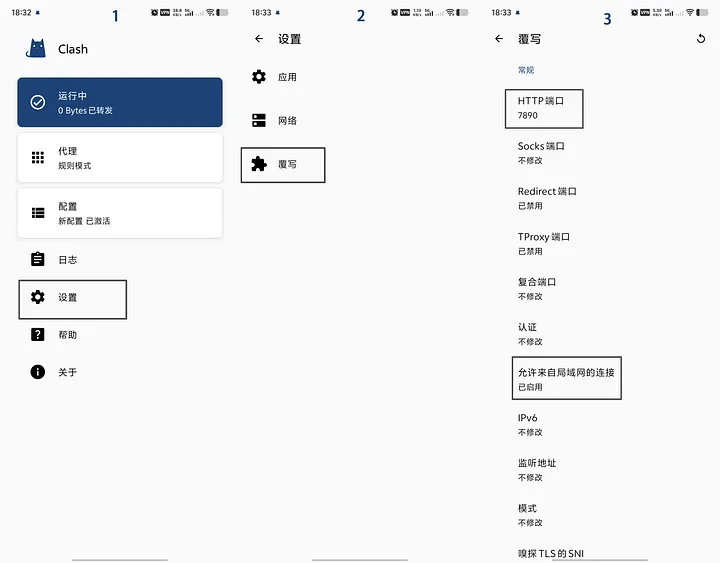
In Clash settings, you need to enable 'Allow connections from the local area network' and set the HTTP port to '7890'. After enabling, return to the software homepage. If the VPN is running, turn it off and then start it again. Check again if the device can access the external network.
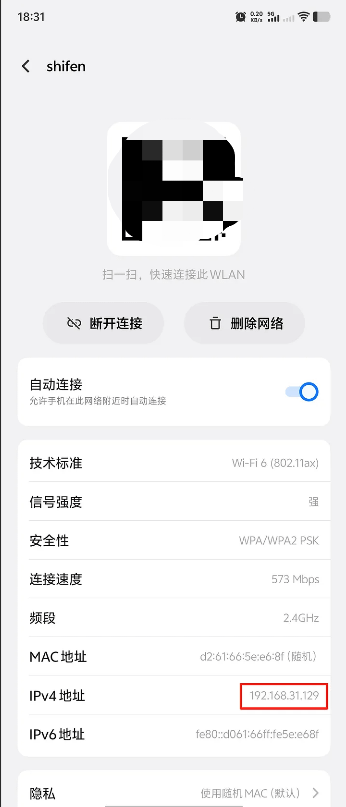
2️⃣ Go to the Wi-Fi settings center, check the local network IP address of Wi-Fi, and record it. This is needed when the Seeker phone connects to Wi-Fi.
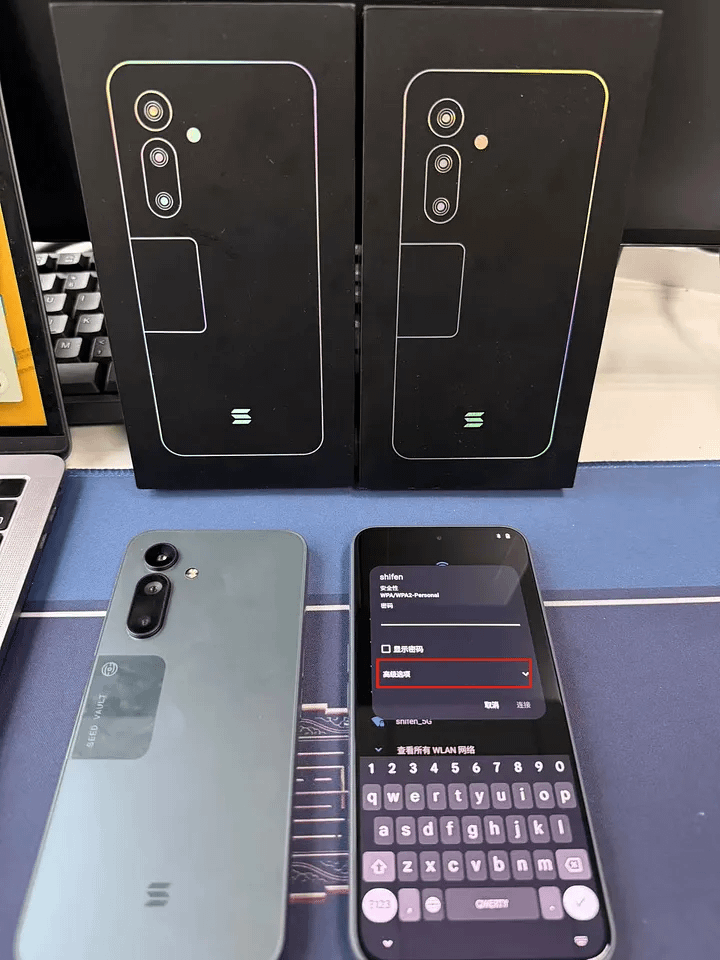
3️⃣ Turn on the Seeker phone, configure the network, and connect to the same Wi-Fi as the main phone. Note that after entering the password, do not directly click connect; you need to click 'Advanced options' to add the proxy.
4️⃣ Activate in the order of steps, skipping any steps that can be skipped. To activate the device quickly, do not copy the first step of copying and applying and data. Log in to your Google account after entering the system.
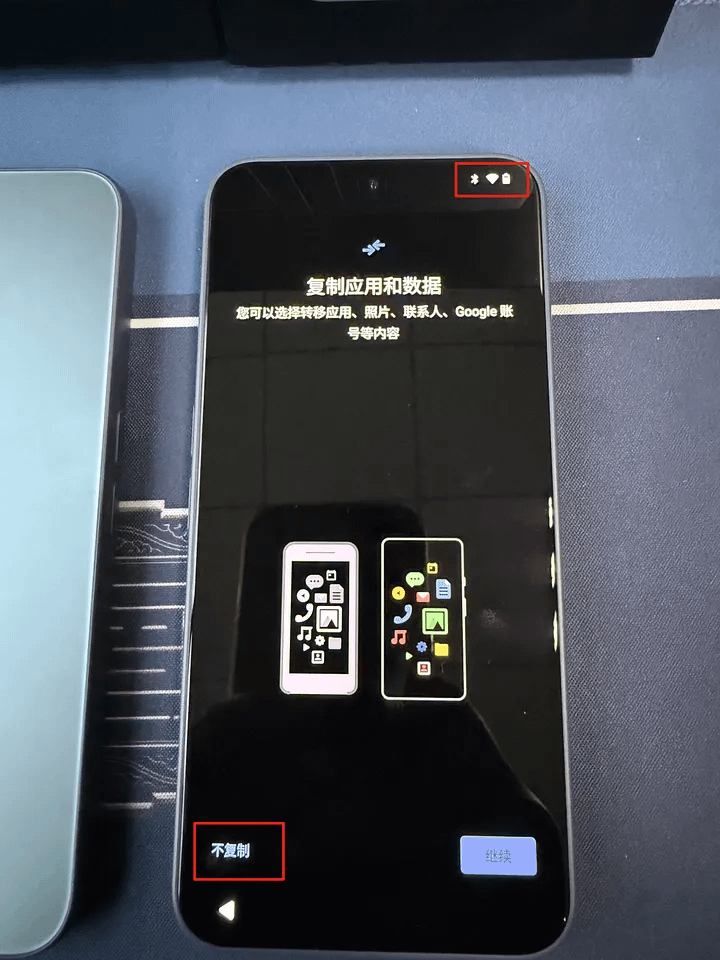
5️⃣ After connecting to Wi-Fi, it may take time to connect to the VPN. When prompted with activation failure for the first time, check the Wi-Fi status for any exclamation marks. If the exclamation mark disappears, it means you have successfully connected to the shared VPN network.
6️⃣ What to do if software update is required?
You can try clearing the data to restore the initial settings and start again.
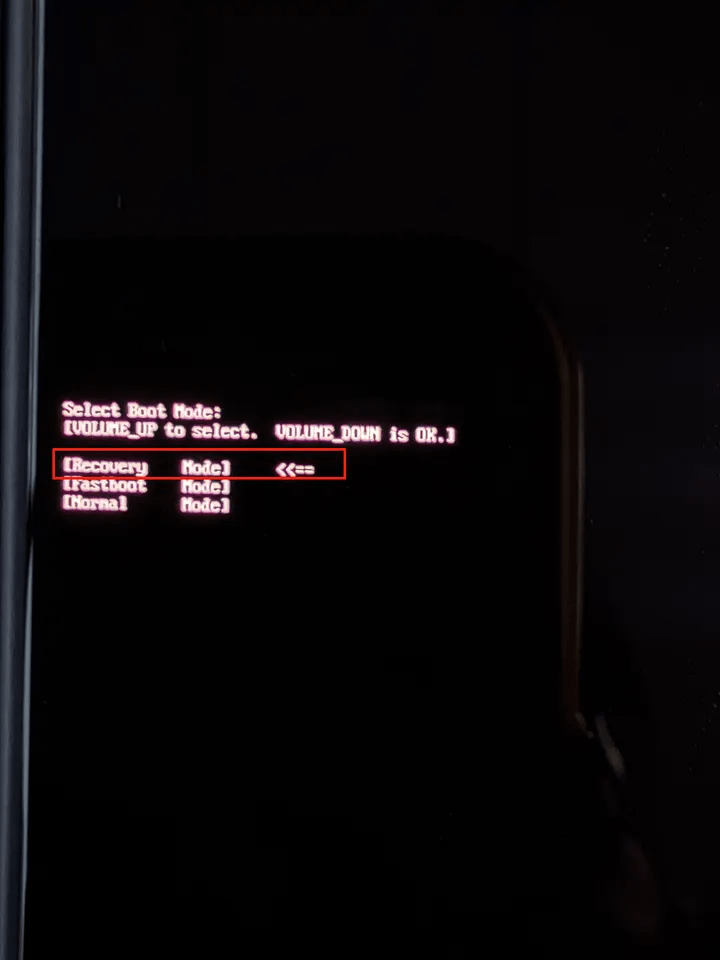
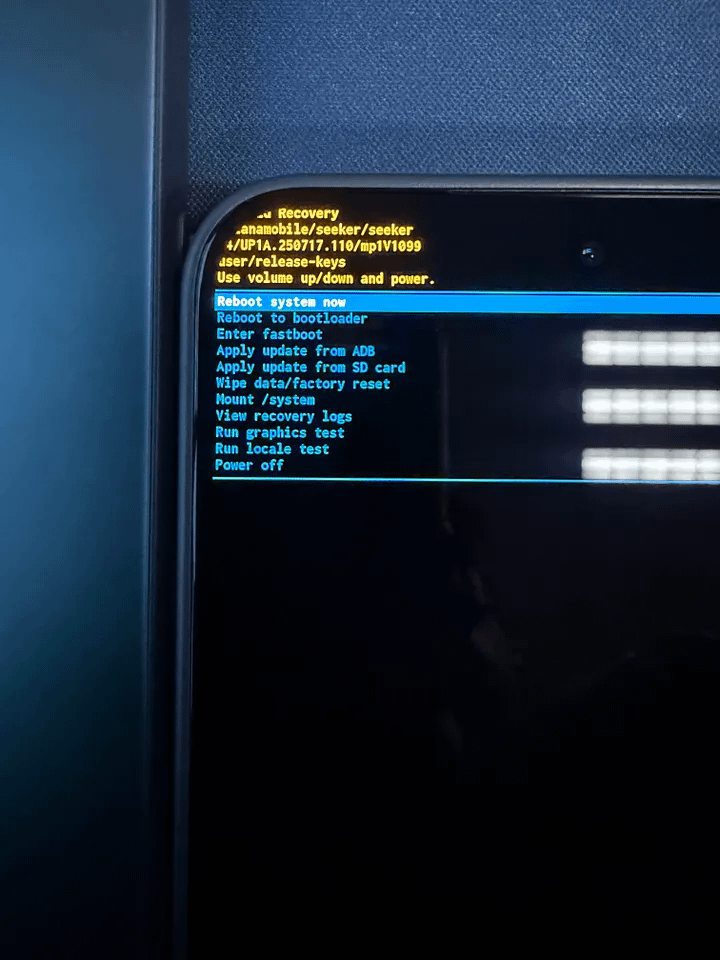
After shutting down, press and hold both【Volume +】and【Power】buttons.
Use the【Volume +】button to move the cursor to【Recovery】and press【Volume -】to enter.
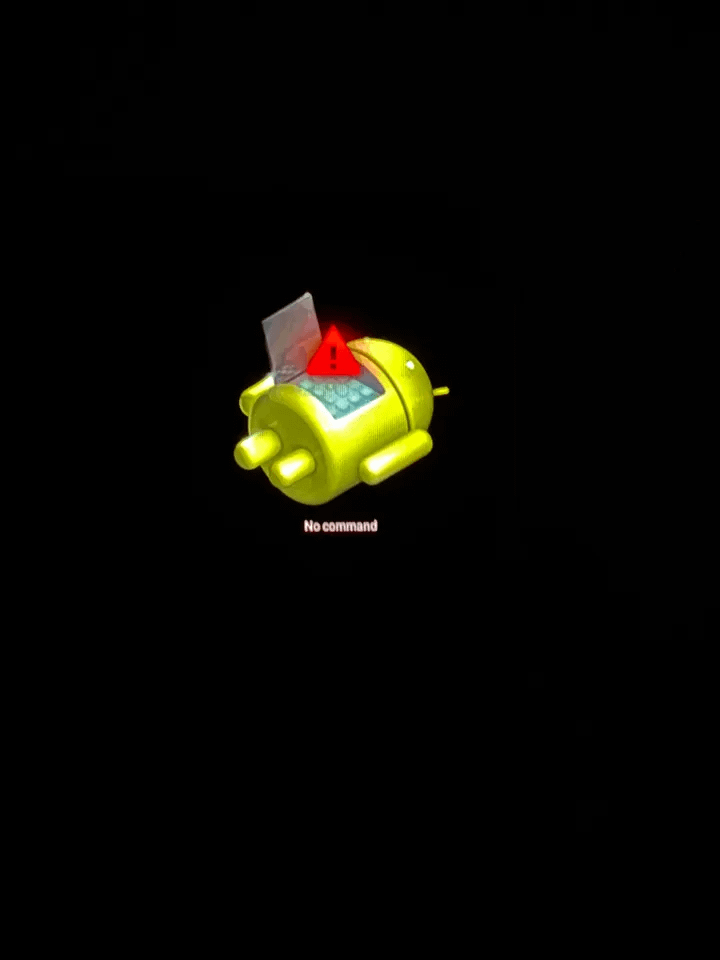
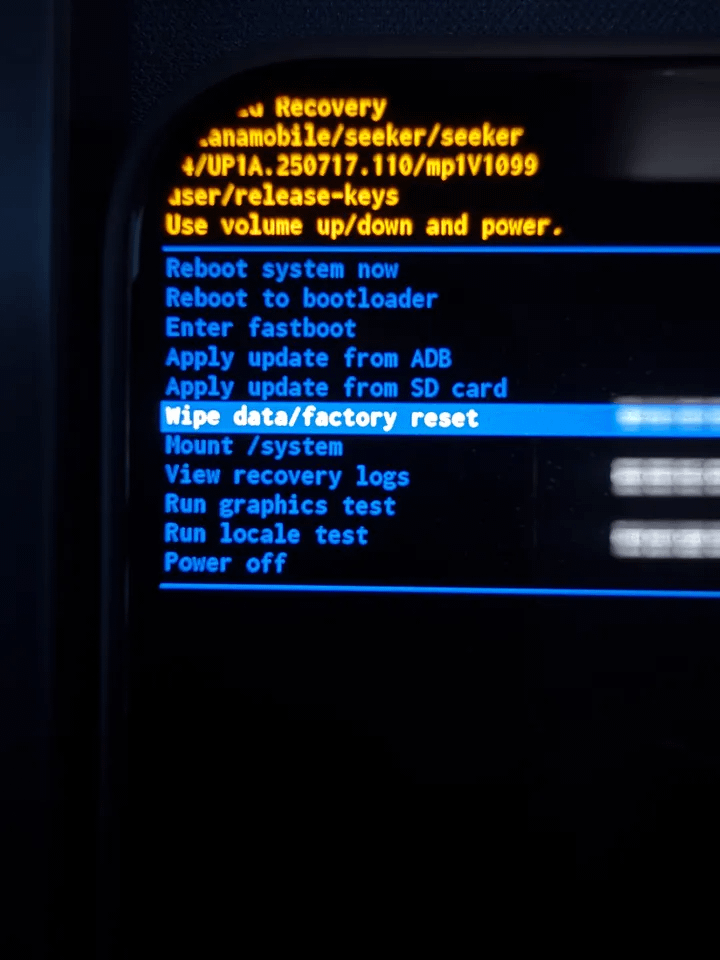
If you see 'no command', press and hold the【Power】button, then press【Volume +】to enter recovery mode. Choose【wipe data/factory reset】and confirm with the【Power】button.
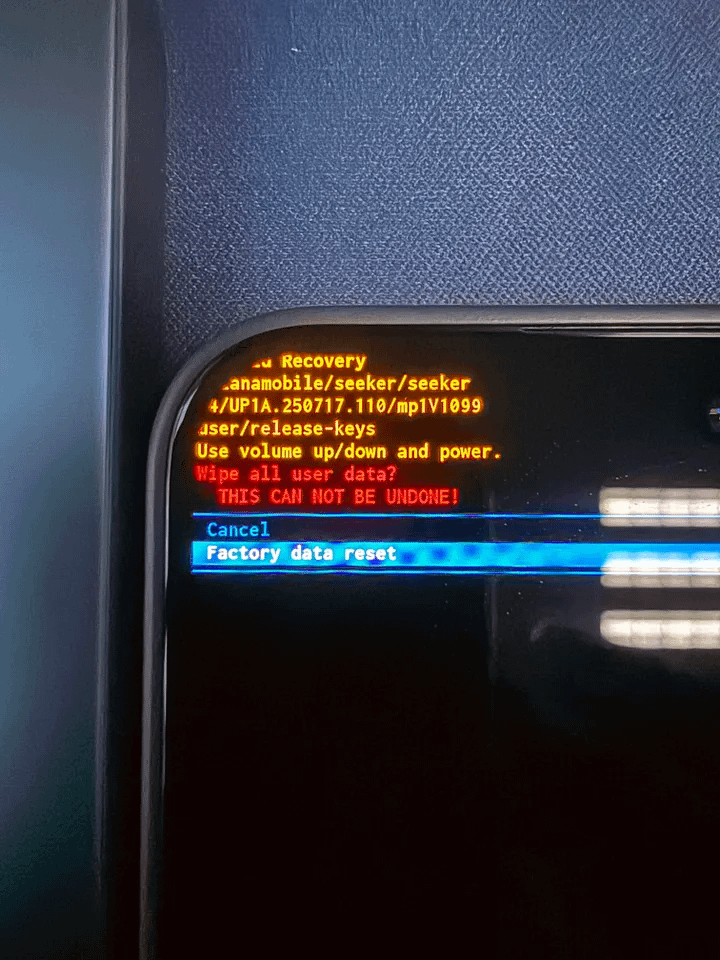
After successfully erasing data, choose to restart.
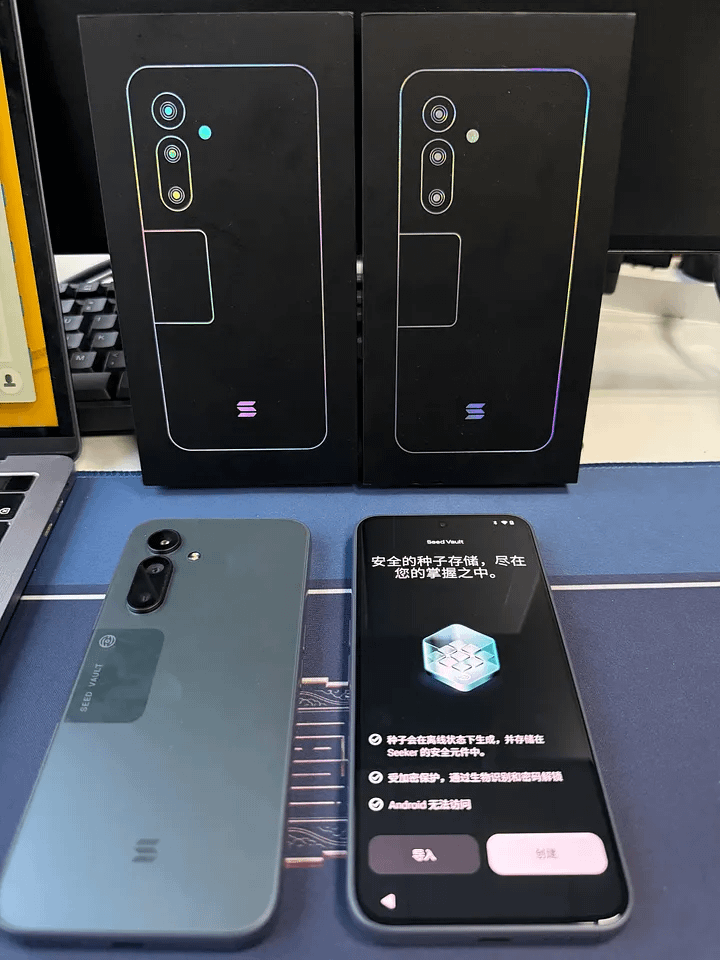
The failure to share VPN to the local area network from the phone is mostly due to slow proxy node networks. You can try using a faster proxy node. After successfully entering the system, first complete the initial setup according to the screen prompts. You will be prompted to set up a seed wallet. It is crucial to pay attention to this step: when generating the wallet, make sure to record the mnemonic phrase separately. It is recommended to handwrite the backup directly on paper. Because in rare cases during subsequent use, the seed wallet may accidentally disappear, and if you do not have a backup, the assets in the wallet may never be retrieved.
After all settings are completed, it is recommended to quickly go to the Google Play Store to download the tools you commonly use and complete the configuration. After that, you can use this tool for daily proxy access (the method used during activation is only temporary). It is worth noting that after activation, Seeker can use domestic phone cards normally.
The above tutorial is compiled from the internet for reference, I will not repeat it.
\u003ct-79/\u003e\u003ct-80/\u003e\u003ct-81/\u003e